
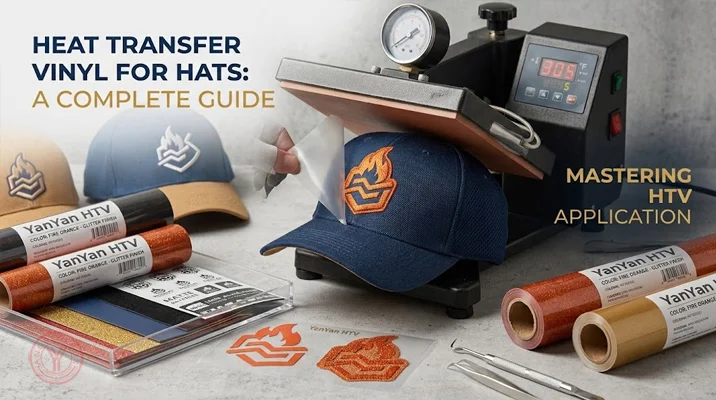
Looking for the right heat transfer vinyl for hats? Hats are different from T-shirts because the front panel is curved, smaller, and often has a center seam. The HTV needs to follow the shape of the hat and receive enough heat and pressure for proper adhesion.
For most cotton and polyester hats, thin and flexible PU HTV is a practical choice for logos, lettering and simple graphics. Flock HTV is useful when a thicker, textured finish is preferred or when the design needs more body on a structured cap. Glitter, metallic, puff, reflective and holographic HTV are also available for specialty hat designs.
The best choice is not simply the vinyl with the most attractive finish. Hat material, hat construction, design size, vinyl thickness and pressing conditions all affect the final result — the sections below go through each of these one at a time.
What Is the Best Heat Transfer Vinyl for Hats?
PU HTV is a good starting choice for most hat applications because it is thin, flexible and works well for logos, names and lettering. Flock HTV is another good option for structured hats when a thicker surface is wanted.
For specialty designs, you can use glitter, metallic, puff, reflective or holographic HTV. The right material should match the hat fabric and the required pressing temperature — see the material-compatibility table below for specifics.
| HTV Type | Recommended Use | Main Feature |
|---|---|---|
| PU HTV | Logos, names and lettering | Thin and flexible |
| Flock HTV | Structured caps and textured designs | Soft, raised surface |
| Glitter HTV | Fashion and decorative hats | Sparkling finish |
| Metallic HTV | Premium logos and branding | Metallic appearance |
| Puff HTV | Streetwear and bold logos | Raised 3D effect |
| Reflective HTV | Outdoor and visibility designs | Reflective effect |
| Holographic HTV | Fashion and promotional hats | Color-changing visual effect |
| Printable HTV | Detailed and full-color graphics | Print-ready surface |
What Is Heat Transfer Vinyl for Hats?
Heat transfer vinyl, also called HTV or iron-on vinyl, is a heat-activated film used to decorate textiles. A cutting machine cuts the design, the unwanted material is removed during weeding, and the finished design is transferred to the fabric with heat and pressure.
When used on hats, HTV is commonly applied to the front panel of baseball caps, trucker hats, dad hats, sports caps and other heat-compatible headwear.
Unlike adhesive vinyl, HTV is designed to bond with fabric when heated. This makes it suitable for textile decoration where a permanent adhesive film is not the right material.
Why Is HTV on Hats Different From HTV on T-Shirts?
A T-shirt provides a relatively flat surface. A hat does not.
The front of a cap is curved, and many hats have a center seam running through the middle of the front panel. Structured caps can also have stiff backing or reinforced panels. These features make it harder to achieve even pressure during heat transfer.
The main issues when applying HTV to hats are:
- Curved pressing surfaces
- Center seams
- Uneven pressure
- Limited design space
- Heat-sensitive fabrics
- Structured front panels
- Foam and mesh construction
Good contact between the HTV, hat and pressing surface is especially important. Cricut recommends smoothing the hat over the pressing form and avoiding air gaps during application.
Best HTV Types for Hats
PU Heat Transfer Vinyl
PU HTV is one of the most practical options for everyday hat customization. Its thin and flexible construction makes it easier to follow a curved front panel than many thicker films, so it's commonly used for company logos, names, numbers, lettering and simple graphics — a clean, low-profile finish without adding much thickness to the hat.
Flock Heat Transfer Vinyl
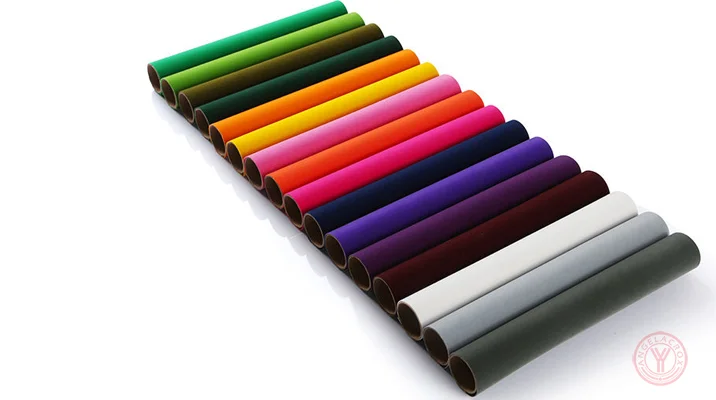
Flock HTV has a thicker surface with a soft, fabric-like texture, giving the finished design more body than standard smooth HTV. It can be a good option for structured caps, bold lettering and sports-style graphics, or whenever a soft textured finish is preferred over a smooth vinyl surface.
Flock isn't automatically "better" than PU for hats — it trades flexibility for texture, so the right pick depends on the design and the cap's structure rather than one material outperforming the other across the board.
Glitter Heat Transfer Vinyl
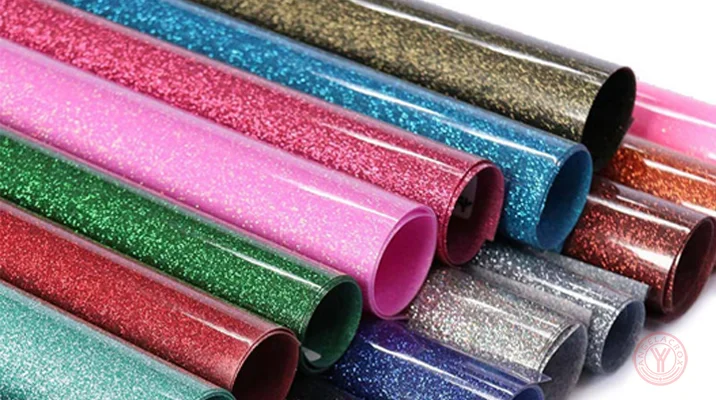
Glitter HTV is used when the hat needs a more decorative appearance. It is popular for fashion hats, event merchandise, children's hats, team products and personalized headwear.
Because glitter vinyl is generally thicker than standard PU HTV, test the design on the actual hat before starting production — the extra thickness is the main reason glitter designs are more prone to edge-lifting on a curved panel than a plain PU logo of the same size.
Metallic Heat Transfer Vinyl
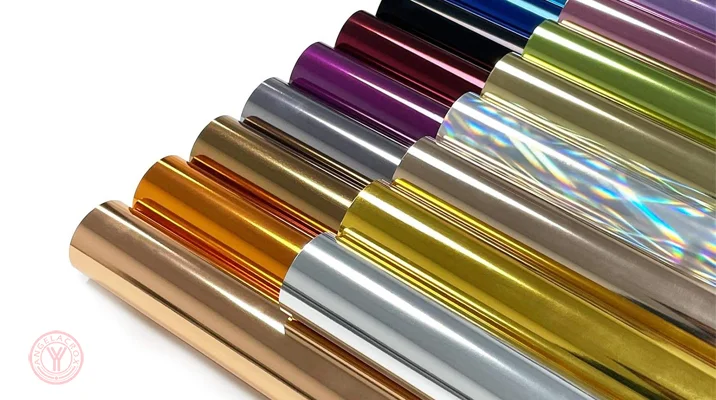
Metallic HTV creates a shiny metallic surface that works well for premium logos, fashion designs and promotional hats. Gold, silver and other metallic shades can provide strong contrast on dark caps, which is useful when a standard flat color doesn't give enough visual impact.
Puff Heat Transfer Vinyl
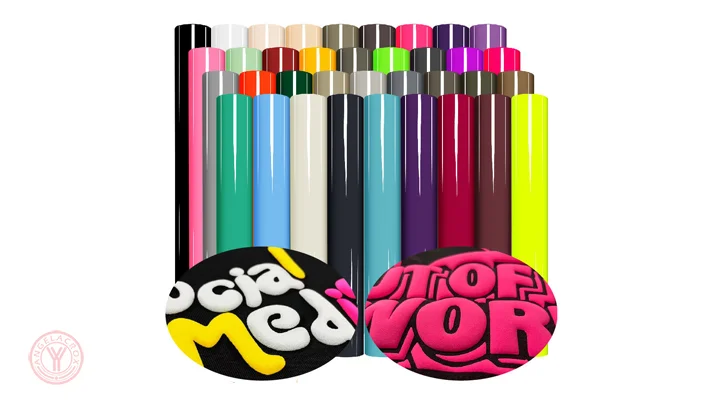
Puff HTV expands during heating and creates a raised surface. It is often used for streetwear, sportswear and bold branding. Keep puff designs reasonably simple — very small details and narrow lines can lose definition once the material expands, and expansion also means puff designs generally need a lighter, more controlled pressure than flat films (see the settings table further down).
Reflective Heat Transfer Vinyl
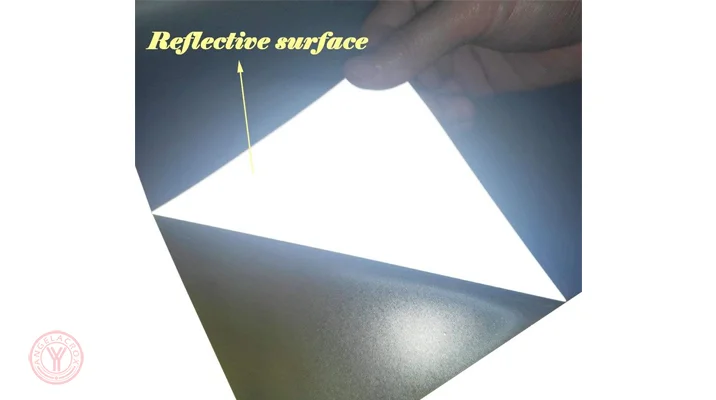
Reflective HTV is designed for applications where the graphic needs to reflect light — workwear hats, outdoor products, safety-related designs and promotional headwear. For regulated safety applications (e.g. hi-vis workwear standards), confirm the specific reflective material's certified performance before production; not all reflective HTV meets formal safety-standard requirements.
Holographic Heat Transfer Vinyl
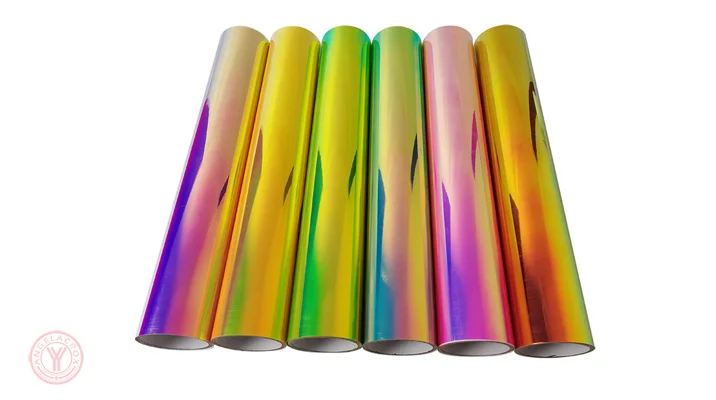
Holographic HTV produces a high-impact surface with changing colors as the viewing angle changes. It is suitable for fashion caps, promotional products and decorative designs.
Which HTV Is Best for Different Hat Materials?
The fabric of the hat should be considered before choosing HTV.
| Hat Material or Type | HTV Starting Choice | Important Consideration |
|---|---|---|
| Cotton hats | PU or Flock HTV | Good compatibility with standard textile HTV |
| Polyester hats | Polyester-compatible PU HTV | Use a suitable transfer temperature |
| Cotton/polyester blends | PU or Flock HTV | Test the actual fabric blend |
| Structured caps | PU or Flock HTV | Curvature and pressure are important |
| Unstructured caps | Flexible PU HTV | Flexible film follows the fabric more easily |
| Trucker hats | PU HTV | Apply to the suitable front panel |
| Foam-front hats | Low-temperature compatible HTV | Foam can be sensitive to heat |
| Performance fabrics | Flexible or stretch HTV | Check fabric and adhesive compatibility |
Not every section of a hat should be pressed — mesh, foam, plastic components, eyelets and some synthetic materials can be sensitive to high heat, so check the hat's construction and run a test transfer before committing to a full production run.
What Equipment Do You Need for HTV on Hats?
A dedicated cap press is the preferred equipment for commercial hat production because its curved platen is designed for the front panel of a cap. A typical setup includes:
- Cap or hat heat press
- Heat transfer vinyl
- Cutting plotter
- Weeding tools
- Heat-resistant tape
- Protective sheet when required
- Suitable cap platen or pressing form
- Lint roller
A standard flat heat press can be difficult to use on curved hats because the platen is flat while the front panel of the cap is not; some users work around this with small presses or attachments, but pressure may still be uneven. For occasional customization a small-format solution may be sufficient, but for regular production a dedicated cap press normally gives more consistent results — its main advantage isn't temperature, it's better physical contact with the curved panel.
How to Apply Heat Transfer Vinyl to Hats
1. Select the Hat and HTV
Check the hat fabric, construction and heat resistance. Select HTV that is compatible with the material.
2. Create the Design
Keep the design within the usable area of the front panel. Simple logos and lettering are usually easier to apply than very large or highly detailed graphics.
3. Mirror the Design
Mirror standard HTV artwork before cutting so the design appears in the correct direction after transfer.
4. Cut the HTV
Place the HTV on the cutting mat according to the product instructions and cut the design with a compatible cutting machine.
5. Weed the Design
Remove the unwanted vinyl and leave the finished graphic on its carrier sheet. Small hat designs require careful weeding — avoid extremely thin lines if they are not necessary for the artwork.
6. Prepare the Hat
Remove dust and loose fibers with a lint roller. Place the hat securely on the cap platen and smooth the front panel.
7. Position the Design
Place the design on the front panel, away from difficult seams when possible. Use heat-resistant tape if needed to hold the carrier in place.
8. Press the HTV
Set the heat press according to the HTV manufacturer's recommended temperature, time and pressure. Don't use one setting for every HTV type — PU, flock, glitter, metallic and puff materials can have different requirements (see table below).
9. Peel the Carrier
Follow the recommended peel method for the specific HTV. Some materials require a warm peel, while others need to cool before the carrier is removed.
10. Inspect the Transfer
Check the edges and surface of the design after pressing. Look for lifting edges, wrinkles, incomplete adhesion or areas affected by seams.
Heat Press Settings for HTV on Hats
There is no universal heat press setting for all hat HTV — the numbers below are starting points from named manufacturers' own published specs, not fixed rules. The actual product's spec sheet always takes priority, because formulations vary even within one brand's own HTV line-up.
| Brand / Product | Temperature | Time | Pressure | Peel |
|---|---|---|---|---|
| Siser EasyWeed (standard PU) | 305°F / 150°C | 10–15 sec | Medium | Hot or cold |
| Siser P.S. Film – EasyWeed | 302°F / 150°C | 15 sec | Medium | Hot or cold |
| Siser StripFlock (flock) | 320°F / 160°C | 15–20 sec | Medium | Cold |
| Siser Glitter | 320°F / 160°C | 10–15 sec | Firm | Hot |
| Siser Metallic | 305°F / 152°C | 10–15 sec | Medium | Cold |
| Siser Holographic | 320°F / 160°C | 10–15 sec | Firm | Cold |
| Siser 3D XPD (puff) | 345°F / 175°C, then a light-touch second step | 5 sec + 15 sec | Medium, then unlocked/light | Per step |
| Stahls' CAD-CUT® Adhesive | 300°F | 3–5 sec | Light | Product dependent |
| YanYan PU HTV | 284–293°F / 140–145°C | 8–10 sec | Medium | Warm |
| YanYan Flock HTV | 302–320°F / 150–160°C | 10–15 sec (+3–5 sec second press with cover sheet) | Medium (3–5 kg) | Cold |
| YanYan Glitter HTV | 284–293°F / 140–145°C | 8–10 sec | Medium (3–5 kg) | Warm |
| YanYan 3D Puff HTV | 311–329°F / 155–165°C | Front 8 sec, then back 15 sec | Medium (3–5 kg) | Cold |
A few things worth pulling out of this table:
- Puff isn't pressed like a flat film. Siser's own 3D XPD instructions use a two-step process — a brief firm press to activate the material, then a second, lighter pass with the platen barely touching the garment while the foam expands. Pressing puff the same way you'd press standard PU is a common cause of flattened or uneven puff designs.
- "Flock and glitter run hotter than plain PU" isn't just a rule of thumb — in Siser's own chart, StripFlock, Glitter and Holographic all specify 320°F/160°C versus EasyWeed's 305°F/150°C, a real 15°F/10°C difference that matters on heat-sensitive cap fabrics.
- Even within one "type" of HTV, brands disagree slightly on peel (hot vs cold), which is why the peel column is never safe to guess from the material category alone.
(Sources: Siser CAD-material reference chart via USCutter[1]; Siser P.S. Film technical data sheet[2]; Stahls' CAD-CUT Adhesive application instructions[3].)
Cap-Specific Data From a Dedicated Hat Press
Cricut's Hat Press — a press built specifically for curved cap panels — doesn't use one fixed temperature. Its official specs[4] show three presets: low for lightweight, delicate or heat-sensitive fabrics (and for more delicate HTV like foil iron-on), medium for most fabrics and standard heat transfer vinyl, and high, up to 400°F, reserved for Infusible Ink and sublimation. The maximum recommended design size for a single pressing cycle is 2.25 in. high × 4.25 in. wide, positioned at least 0.5 in. from the brim — both figures come directly from Cricut's own hat-press documentation, not a general estimate.
A real-world case from Stahls'[5] illustrates why the "low" preset for heat-sensitive fabric exists: a customer pressed CAD-CUT Fashion-FILM, which applies at 320°F, onto a moisture-wicking polyester cap and got a visible scorched "ghost" outline around the design from the heat alone — not from the vinyl. Stahls' general guidance for that kind of performance-fabric cap is to look for a material that applies below 280°F, or to add a protective cover sheet between the platen and the fabric. This is a useful concrete illustration of why "check the hat fabric's heat tolerance" isn't just boilerplate advice — it's the difference between a clean logo and a visible burn mark.
Excessive heat can damage polyester, foam and other heat-sensitive materials; too little heat results in weak adhesion. For commercial production, test the complete combination of hat, HTV and press together — testing the vinyl alone on a flat scrap of fabric won't reveal problems that only show up on the curved, seamed surface of the actual hat.
What Size Should HTV Be on a Hat?
Hat designs are normally smaller than T-shirt designs because the front panel provides less usable space. A common starting point for an adult baseball cap is approximately 3 to 5 inches wide and 2 to 3 inches high, but the exact size should be based on the actual hat rather than a fixed template.
Can HTV Go Over the Center Seam of a Hat?
It can, but placing the design away from the center seam is usually easier, because a raised seam can prevent even contact between the vinyl and platen — this can show up as a thin, poorly-adhered band right where the seam sits, even when the rest of the design bonds fine. If the design must cross the seam, the pressing setup needs to provide sufficient, even contact across the entire design, not just the flat sections either side of it.
Troubleshooting: Peeling, Wrinkling and Edge-Lifting
Most hat-HTV defects trace back to one of three things: heat, pressure, or contact with the curved surface. Instead of listing causes and fixes separately, here's how the symptom, likely cause and first thing to check line up:
| Symptom | Most Likely Cause | First Thing to Check |
|---|---|---|
| Whole design peels off cleanly, edges intact | Overall under-heating or under-pressing (temperature, time, or pressure too low) | Confirm actual platen temperature with a separate thermometer — press displays can drift from true surface temperature |
| Only the edges lift, center holds | Uneven pressure across the curved panel, or an air gap under the carrier | Check that the hat is smoothed flat on the platen with no bunching, and that the carrier was taped down before pressing |
| Peeling concentrated along one line through the design | Design crosses the center seam | Consider repositioning off the seam, or add a second lower-pressure pass focused on the seam area |
| Design wrinkles or bubbles right after pressing | HTV too stiff for the curvature, or design too large for the panel | Switch to a thinner/more flexible film, or reduce design width |
| Design looks fine hot, lifts after cooling | Wrong peel method for this HTV (cold peel treated as hot peel, or vice versa) | Re-check the product's peel instructions — this is specific to each HTV, not a general rule |
| Adhesion fails only on specific colors within a multi-color design | Layering order or an incompatible color/finish combination (e.g. glitter layered under standard film) | Confirm the layering sequence and compatibility recommended by the HTV manufacturer |
How Do You Make HTV Hats Last Longer?
Beyond getting the initial press right, longevity mostly comes down to two things the customer controls: how the hat is cleaned, and how much flexing the design area takes. Follow the HTV's specific washing instructions (many recommend cold water, gentle cycle or hand wash, and avoiding a dryer), and avoid folding or crushing the front panel repeatedly, since repeated flexing along a fold line is a common cause of cracking in the film over time — this applies more to PU and metallic finishes than to flock, which tolerates flexing better.
HTV vs Embroidery for Hats
| Feature | HTV | Embroidery |
|---|---|---|
| Solid-color logos | Excellent | Excellent |
| Multiple colors | Easy to produce | More thread changes |
| Metallic effect | Available | Limited |
| Glitter effect | Available | Not typical |
| Puff effect | Available | Different process (3D puff embroidery) |
| Detailed graphics | Depends on HTV | Depends on stitch design |
| Small batch customization | Very practical | More setup may be required |
| Feel on the seam/curve | Can show slight stress lines over the seam | Stitching naturally follows contours without stress lines |
| Surface feel | Film-based, smoother | Thread-based, more textured |
HTV is particularly useful when you need specialty colors, effects or quick customization. Embroidery remains a strong option for traditional stitched logos and classic corporate headwear — and tends to hold up better on the seam itself, since stitching flexes with the fabric rather than sitting as a rigid film across it.
HTV vs DTF for Hats
DTF (direct-to-film) transfers are another option for decorating hats, especially when the artwork contains detailed full-color graphics or gradients that would be impractical to cut from single-color HTV sheets.
HTV is generally more convenient for names, numbers, simple logos, solid-color graphics, and specialty finishes like metallic, glitter, flock or puff that DTF can't easily replicate. DTF's advantage is handling detailed images and full-color artwork in one print rather than layering multiple cut colors.
Which process is better depends on the artwork, production quantity, required appearance and available equipment — a simple one-color logo run favors HTV's lower setup cost, while a photo-realistic full-color design favors DTF.
Choosing an HTV Supplier for Hat Production
For commercial hat production, picking HTV by color and finish alone isn't enough — the supplier relationship matters just as much, because inconsistent batch-to-batch quality is one of the most common (and hardest to diagnose) causes of production problems. Before placing a bulk order, it's worth checking a supplier against a short list of criteria:
- Material range: Can they supply the base film type your project needs — PU, TPU, PET, PVC or silicone constructions — rather than a single generic option?
- Finish range: Do they offer the specialty finishes (glitter, metallic, flock, puff, reflective, holographic) in-house, or are these subcontracted, which can affect consistency?
- Sampling process: Will they send samples on your actual hat material before a bulk order, and how long does that turnaround take?
- Custom color matching: Can they match a Pantone reference or physical sample, and what's the minimum order for a custom color?
- OEM/ODM capability: If you need custom sizing, thickness or packaging, is that offered as standard or as a special request?
As one example of a supplier in this space, YanYan manufactures heat transfer vinyl in PU, TPU, PET, PVC and silicone constructions, covering standard HTV as well as glitter, metallic, flock, puff, reflective and holographic finishes, with custom color matching and OEM/ODM production available for commercial orders. As with any supplier, the sensible approach is the same regardless of who you buy from: request a sample on your actual hat material — particularly for structured caps, specialty finishes and heat-sensitive fabrics — before committing to a bulk order.
Frequently Asked Questions About Heat Transfer Vinyl for Hats
What is the best heat transfer vinyl for hats?
There's no single "best" — PU HTV is the most broadly practical choice for logos and lettering because it's thin and flexible enough to follow the curve. Flock is the better call specifically when you want texture and body rather than a smooth finish. Reach for glitter, metallic, puff, reflective or holographic only when the design calls for that specific effect, since they generally cost more and are less forgiving to apply.
Can you use regular (non-hat-specific) HTV on hats?
Yes, as long as the film is rated for the hat's fabric and the pressing conditions are within its spec. There's no special "hat-only" category of HTV — the practical difference is entirely in the equipment (a curved cap platen) and technique, not the vinyl itself.
Do you need a dedicated hat press, or can a flat heat press work?
A dedicated hat press is recommended for consistent results because its curved platen matches the front panel, giving even contact. A flat press can work for occasional, low-volume customization with a workaround attachment, but pressure tends to be uneven across the curve, which raises the risk of edge-lifting — for repeat production, the cap press pays for itself in reduced rework.
What temperature and time should I use for HTV on hats?
It depends on both the finish and the brand, not just "HTV" as a category. As published reference points: Siser EasyWeed runs 305°F/150°C for 10–15 seconds, while Siser's flock, glitter and holographic lines run about 15°F/10°C hotter at 320°F/160°C, and puff (3D XPD) uses a two-step press rather than one continuous one. Stahls' CAD-CUT Adhesive, by contrast, applies at just 300°F for 3–5 seconds under light pressure. Always default to the specific product's instructions over any general range — the "correct" setting is a property of that film's adhesive formulation and brand, not of hats or even HTV categories in general.
Can HTV be used on trucker hats and foam-front hats?
On trucker hats, yes — apply to the solid front panel and treat the mesh back as a separate, more heat-sensitive material that generally shouldn't be pressed the same way. On foam-front hats, some HTV works, but foam distorts or melts more easily under heat, so a lower-temperature-compatible film and a shorter test run are worth doing before a full batch.
Can HTV go over the seam, and why does it sometimes fail there?
It can, but it's the single most common point of failure in hat HTV work, because the raised seam physically lifts the film away from even platen contact right at that line. If the design must cross it, plan for a second, lighter pass focused just on the seam area rather than assuming one press cycle will bond evenly across a surface that isn't flat.
Why does my HTV keep peeling, wrinkling or lifting at the edges?
See the troubleshooting table above — the short version is that clean full-design peeling points to under-heating/under-pressing, edge-only lifting points to uneven contact or air gaps, and wrinkling points to a film that's too stiff for the curve or a design that's too large for the panel.
Can I wash a hat after applying HTV, and does that shorten its lifespan?
Yes, when the transfer was applied correctly. Most HTV holds up to normal washing if you follow the specific product's instructions (commonly cold water, gentle cycle, no dryer). What shortens lifespan is usually mechanical flexing — repeatedly folding or crushing the front panel along the design — more than washing itself.
Should I test HTV before bulk hat production, and what should the test actually cover?
Yes — and the test should use the real hat, not a flat swatch of the same fabric. Testing on a flat sample won't reveal seam interference, curvature-related wrinkling, or platen contact issues, which are the failure modes specific to hats rather than to the fabric itself.
How does ordering samples, custom colors or OEM production typically work?
Practices vary by supplier, so treat any specific numbers as a starting point to confirm rather than an industry standard: many suppliers offer free or low-cost samples with the customer covering shipping, standard products often start from a low minimum order (sometimes as little as one roll), and custom colors or OEM/ODM work usually require a larger minimum and additional lead time for development and testing. Always confirm current terms directly with the supplier before planning production around them.
References
- Siser CAD-Material Reference Chart (temperature/time/pressure/peel by product) — USCutter, PDF
- Siser P.S. Film – EasyWeed technical data sheet — Carter's, PDF
- Stahls' CAD-CUT® Adhesive application instructions — Stahls', PDF
- Cricut Hat Press official specs and FAQ — Cricut Help Center
- "Cap Off Your Job with the Right Accessories" (Fashion-FILM ghosting case on a moisture-wicking cap) — Stahls' Blog
Final Takeaway
The best heat transfer vinyl for hats depends on the hat and the design. For clean logos and lettering, flexible PU HTV is a practical starting point; flock works well when a thicker, textured finish is wanted; glitter, metallic, puff, reflective and holographic HTV cover fashion, promotional and specialty needs.
The part that actually determines success isn't picking the "right" vinyl in isolation — it's the whole chain: compatible fabric, suitable HTV, correct design size, proper platen contact, accurate temperature, sufficient pressure and the correct pressing and peel timing. Skipping the test step on the actual hat, rather than a flat swatch, is the single most common reason bulk runs run into peeling, wrinkling, scorching or inconsistent transfers.