
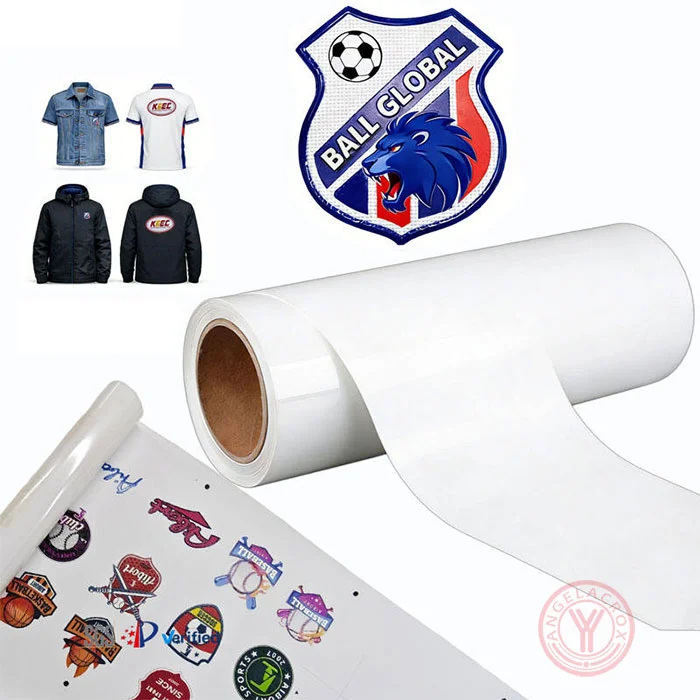
What Is UV Printable Vinyl?
UV Printable Vinyl is a specialized printable film material designed for UV inkjet printing, allowing high-resolution graphics, vibrant colors, and durable custom designs to be directly printed onto the vinyl surface. It is widely used for custom stickers, labels, decals, signage, vehicle graphics, promotional products, and personalized decorations.
Unlike traditional printable vinyl that requires solvent, eco-solvent, or latex printers, UV printable vinyl is optimized for UV-curable inks, which are instantly cured by ultraviolet light during printing. This creates a highly durable printed layer with excellent scratch resistance, weather resistance, and color stability.
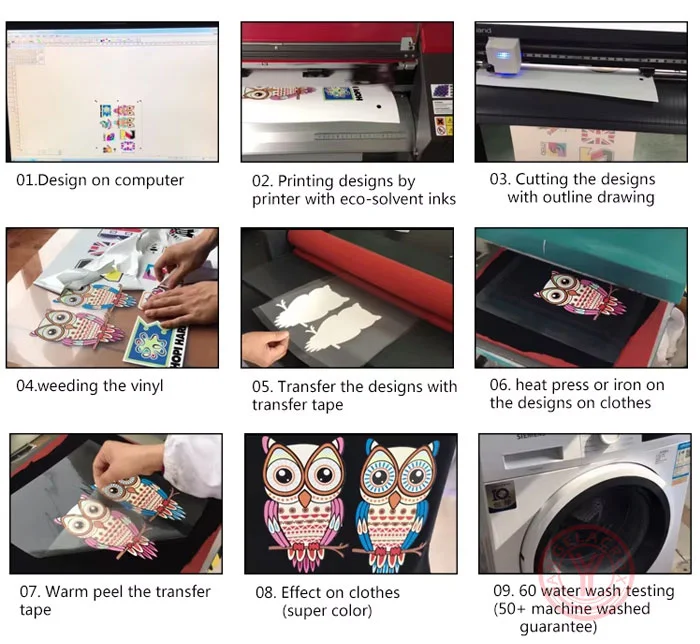
Instructions for Use
To use PU eco-solvent printable vinyl (commonly used as heat transfer vinyl), load the material into your eco-solvent or latex printer. Print your design, dry it if ink is heavy, then cut the contours using a cutter plotter. Weed away excess vinyl, apply a medium-tack transfer mask, and heat press it onto your garment.
01. Design & File Preparation
01. Design & Vectorization: Create or import your high-resolution artwork into the design software. Ensure the graphics are set up with proper cut lines for high-precision output.
02. High-Fidelity Printing
02. Vibrant Eco-Solvent Printing: Print the graphics onto the printable heat transfer vinyl using industry-standard eco-solvent printers. Our vinyl ensures exceptional ink absorption and true-to-life color reproduction.
03. High-Precision Contour Cutting
03. Automated Contour Cutting: Load the printed vinyl into a cutting plotter. Execute precision contour cutting along the pre-registered mark lines to ensure clean, sharp edges around intricate designs.
04. Efficient Weeding
04. Effortless Weeding: Easily remove the excess, unprinted vinyl from the backing liner using a weeding tool. The premium release layer guarantees a smooth and tear-free weeding experience.
05. Application of Heat Transfer Mask
05. Applying Transfer Mask: Place a high-temperature transfer mask over the weeded design. Use a squeegee to smooth out any air bubbles, ensuring the graphic adheres firmly to the mask for seamless lifting.
06. Heat Press Application
06. Heat Press Positioning: Position the masked design onto the target garment. Heat press at standard parameters (150°C–160°C for 10–15 seconds under medium pressure) or use a home iron.
07. Seamless Mask Removal
07. Smooth Warm Peel: Gently peel off the heat transfer mask while the fabric is still warm to reveal the flawlessly embedded, retail-ready design.
08. Retail-Ready Result
08. Vivid Finished Look: The final graphic showcases ultra-bright, saturated colors with a soft-to-the-touch matte texture that integrates seamlessly with the fabric fibers.
09. Industrial Wash Testing
09. 60+ Certified Machine Wash Guarantee: Engineered for long-term durability. Passed rigorous 60-cycle water wash testing with zero cracking, peeling, or fading—built to outlast the garment itself.