
In this guide, we’ll walk you through how to use puff vinyl step by step—from preparing your design and cutting the material to weeding, heat pressing, peeling, and caring for the finished garment. You’ll also learn practical tips for achieving a consistent puff effect and avoiding common transfer problems.
What is Puff Vinyl
Puff vinyl—also called puff heat transfer vinyl (puff HTV) is a heat-reactive, expandable heat transfer film engineered, producing a soft, raised 3D effect on fabric. Before pressing it looks relatively flat; under the correct heat, time, and pressure, the vinyl “puffs” to make lettering or graphics visibly dimensional and tactile.With greater visual depth and tactile appeal than conventional flat heat transfer vinyl.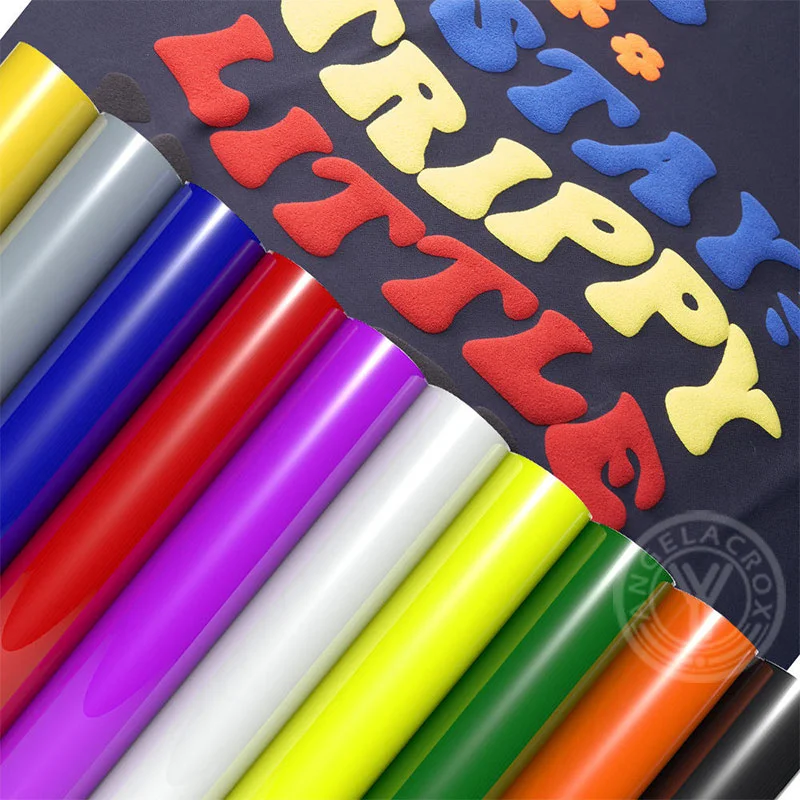
How Puff Vinyl Works
Puff vinyl works by using a special heat-activated foaming agent.When the film reaches its activation range during heat transfer, the expandable components enlarge in volume. This creates the characteristic elevated profile while the adhesive layer anchors the graphic to the garment.Puff Vinyl Application
Puff vinyl is widely used for dimensional decoration on T-shirts, hoodies, sweatshirts, sportswear, children’s apparel, tote bags, and other textile products. Its raised finish is ideal for bold lettering, logos, team graphics, and promotional designs that require greater texture, depth, and visual presence.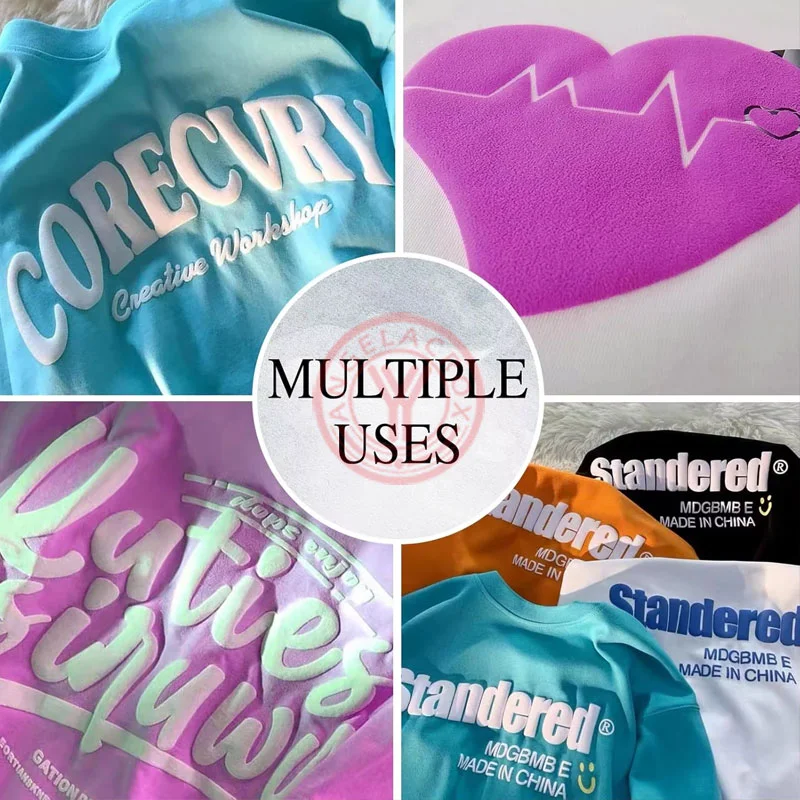
Puff Htv Cut Settings
Puff HTV should be cut in mirror mode with the PET carrier facing down. Use a sharp fine-point or 45° blade, and adjust the cut so it penetrates the film and adhesive layer without cutting through the carrier. Because material thickness, blade condition, and cutter calibration can vary, a test cut is recommended before production.
| Cutting Machine | Material / Blade Setting | Blade Depth | Force / Pressure | Speed | Passes |
|---|---|---|---|---|---|
| Cricut Explore series | Vinyl+ | Fine-Point Blade | Default Vinyl+ pressure | Default | 1 |
| Cricut Maker series | Iron-On | Fine-Point Blade | Default Iron-On pressure | Default | 1 |
| Cricut Maker 3 | Heat Transfer Non-Cricut | Fine-Point Blade | 113 | Default | 1 |
| Cricut Maker series | Flocked Iron-On | Fine-Point Blade | 152 | Default | 1 |
| Silhouette Cameo | Heat Transfer / Flocked profile | 3 | 6 | 8 | 1 |
| Silhouette Cameo 4 | Custom HTV profile | 3 | 15 | 5 | 1 |
| Silhouette Cameo | Custom puff HTV profile | 3 | 15 | 8 | 2 |
| Siser Romeo / Juliet | 45° blade | 45° | 35–45 | 10 | 1 |
Settings are provided as starting points only. Conduct a test cut and adjust blade depth, force, or speed according to the specific film, cutter model, and blade condition.
Puff Vinyl HTV Temperature and Time Chart
Use the chart below as a starting point for testing, rather than a universal setting. Before production, always test the puff vinyl on the actual fabric to confirm proper adhesion, puff height, surface appearance, and durability.| Puff HTV Type | Material | Temperature | Time | Pressure | Peel |
|---|---|---|---|---|---|
| Standard Puff HTV | PU | 150°C / 302°F | Front side 8s,Back 15s | Medium | Cold/Warm Peel |
| Soft Puff HTV | PU / TPU | 145–155°C / 293–311°F | 10–15s | Medium | Cold/Warm Peel |
| Glitter Puff HTV | PU | 150–155°C / 302–311°F | 12–15s | Medium | Cold/Warm Peel |
| Metallic Puff HTV | PU / TPU | 150–160°C / 302–320°F | 10–15s | Medium | Cold/Warm Peel |
| Reflective Puff HTV | PU / PES | 150–160°C / 302–320°F | 10–15s | Medium | Cold/Warm Peel |
| High-Elastic Puff HTV | TPU | 145–155°C / 293–311°F | 10–15s | Medium | Cold/Warm Peel |
The following heat press settings are provided for reference only. Puff HTV can have different transfer requirements depending on its material, finish, thickness, fabric type, and adhesive construction. Temperature and pressing time may also vary between manufacturers and heat press machines.
Puff Vinyl Instructions
Puff vinyl should be processed with controlled heat and pressure to achieve a uniform raised effect. Mirror the artwork before cutting, place the PET carrier side down on the cutting mat, and cut only through the film and adhesive layer without penetrating the carrier. Weed the excess material carefully, then position the transfer on a clean, dry, pre-pressed garment with the carrier facing upward. HTV application guidance commonly specifies mirrored cutting with the carrier/shiny side down, followed by moisture-removing pre-pressing before transfer.| Step | Instruction |
|---|---|
| 1. Prepare artwork | Create the design and mirror the artwork before cutting. |
| 2. Load material | Place puff vinyl with the PET carrier side down and the adhesive side facing up. |
| 3. Test cut | Run a test cut first; the blade should cut the film cleanly while leaving the carrier intact. |
| 4. Cut and weed | Cut the mirrored design, then remove the excess film and retain the graphic on its carrier. |
| 5. Pre-press garment | Pre-press the garment for 3–5 seconds to remove moisture and wrinkles. |
| 6. Position transfer | Place the weeded design on the garment with the PET carrier facing upward. |
| 7. Heat press | Apply with a calibrated heat press according to the film’s technical data sheet. For standard puff HTV, start around 145–160°C (293–320°F) for 10–15 seconds at medium pressure. |
| 8. Peel carrier | Peel warm, or cold according to the product specification. Do not assume peel conditions are universal. |
| 9. Inspect result | Confirm full adhesion, even expansion, clean edges, and an undamaged raised surface. |
Tip:Puff vinyl is sensitive to heat, dwell time, and pressure. Always perform a trial application on the actual fabric before bulk production, especially for polyester, coated fabrics, stretch garments, or dark sublimated textiles. Excessive heat or repeated pressing can affect puff height, surface texture, and edge definition.
Watch this video guide to see a step-by-step demonstration of cutting and pressing puff vinyl:
Wash and Care for the Finished Garment
Proper washing and care can help maintain the adhesion, shape, and raised appearance of puff vinyl over time. Allow the transferred design to cool and fully bond before the first wash.
For best results:
- Wait at least 24 hours before the first wash.
- Turn the garment inside out before washing.
- Wash with cold or warm water, preferably below 40°C / 104°F.
- Use a mild detergent and avoid bleach or harsh chemicals.
- Do not scrub, brush, or soak the puff design for extended periods.
- Do not dry clean unless the specific product has been tested for dry cleaning.
- Tumble dry on low heat or air dry when possible.
FAQs
Why Is My Puff HTV Wrinkled?
Wrinkling is usually caused by trapped moisture, uneven pressure, or excessive heat and press time. Pre-press the garment, use even medium pressure, and avoid repeated pressing to maintain a smooth, raised finish.
Do You Mirror Puff HTV?
Yes. Mirror the design before cutting because puff HTV is cut from the adhesive side and transferred in reverse. This is essential for text, numbers, and asymmetrical artwork.
Can You Layer Puff HTV?
Puff HTV is best used as the top layer because applying another film over it may limit expansion and flatten the 3D effect. For multi-color designs, use a knockout layout or confirm layer compatibility with the supplier before production.
Where to Buy Puff HTV?
Looking for a reliable source for Puff HTV? YanYan is a heat transfer vinyl manufacturer and wholesale supplier with more than 20 years of manufacturing experience. We offer a wide range of 3D Puff Heat Transfer Vinyl in different colors, finishes, sizes, and specifications.
Whether you need a small trial order or regular bulk supply, YanYan supports flexible MOQ, custom colors and finishes, OEM/ODM projects, and fast production. Free samples are also available for testing before placing a bulk order.
Ready to find the right Puff HTV for your project?
Browse our full range of Puff Heat Transfer Vinyl and check the available options and specifications.